How Do I Know Which Design Thinking Method To Use?

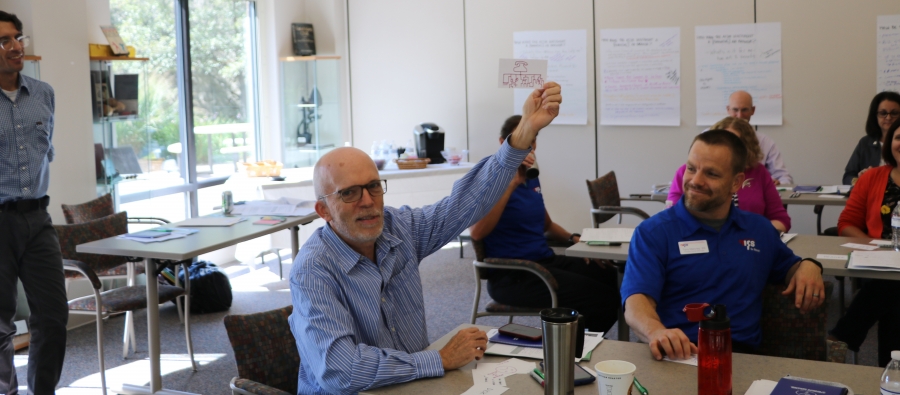
Over the past year, we have hosted several workshops for businesses and organizations throughout the Midwest who see the potential in implementing a human-centered design approach into their work and culture. People often appreciate the process, but have a hard time understanding how to incorporate it into their daily tasks once they leave. Participants often ask, “Is there a guide that will tell me when to use each of the methods?

The answer is, not really.

The good news? There are many research options to get started and working examples of how different methods have yielded data towards solving specific problem spaces, but ultimately, there’s no prescriptive guide for when to use methods. This might sound like a cop-out but the reasoning lies at the core of human-centered design––it all comes back to your unique audience needs.

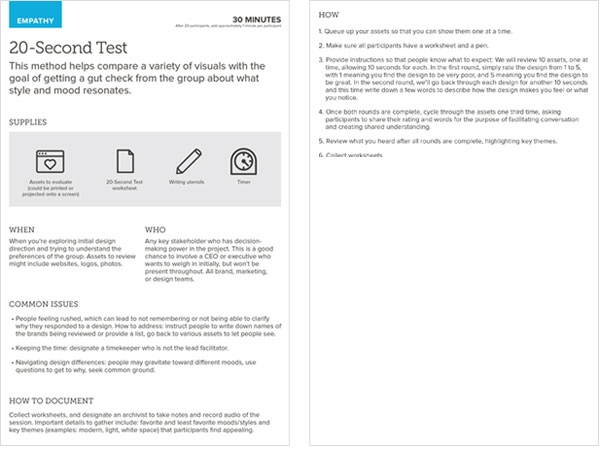
There are standard methods to choose from like interviews, surveys, mapping, observations and card sorting, but we encourage people to embrace the methodology. Don’t feel constrained by the methods you know––iterate, customize, gamify––whatever you need to do to relate to your audience and give and receive valuable input. Know that you may need to adjust and adapt on the fly, that’s okay! That’s part of the process. Try not to get caught up in forcing a method if it is not working. If interviews or surveys are not producing the data you need, reassess. Find out what’s missing and what you need to move forward. You may include analogous observations or immersing yourself in a particular environment to get more helpful information.


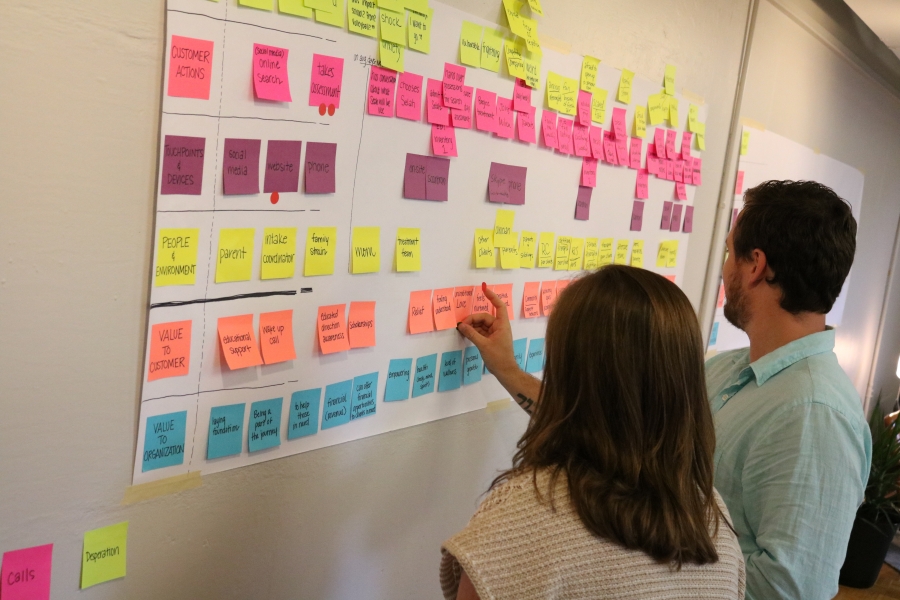
Part of the design process is coming up with a method that will best relate to your audience in a way that will get you the information you need. For example, if you need to customize messages to specific audiences, you may want to interview folks and build out personas. While this means methods are customized for every problem space, there are some common things to think about:

  • What is it that you want to learn?
  • How many different audience types will you need to interact with?
  • How does your audience best communicate?
  • Are you able to have direct communication with them or do you need to explore appropriate indirect methods?
  • How can you relate the experience to something familiar and comfortable for them?
  • What are the limitations of the intended method?
  • How much time or budget is available?

The most important thing to remember is to empathize with the people whose problem you’re striving to solve. Explore different methods, practice them with friends or co-workers to build out techniques and applications, and adapt them to work for you.

How to Ideate: Think About Bad Ideas First

Have you ever pulled your team together for an ideation session that just didn’t go the way you expected? You presented a problem to solve, asked for ideas and the cold, blank stares left you feeling chilled to your bones.

Or maybe you’ve attended a session like this and without preparation, a 900-pound-guerilla-of-a-question is thrown your way so you sheepishly hand it a banana in hopes that it doesn’t eat you.

Whether participating or facilitating, we’ve all been there. When you want to get the most out of your teams’ creative energies, there are endless tips and tricks on how to prepare your team for the session, how to keep the energy alive, how to keep everyone on track, etc.

Today, I thought I’d share a tip on how to warm up your time – the trick to getting to the good ideas is to actually start with the bad ideas.

One way to do this is a quick exercise designed to ease nerves, and help people tap into their creative sides with quick doodles.

  • Give each participant a stack of blank index cards (roughly 10) and a sharpie marker.
  • Write a question/prompt on a board nearby.
  • Give the participants 5 minutes to draw as many bad ideas as they can (bonus points for some background music!).
  • Once the time is up, have participants share their favorite bad ideas.
  • You’ll have the room laughing and the tensions eased.

To take this exercise a step further, you could add a second round and ask participants to go back through their bad ideas and flip them into something that could work. This will help show that there is a fine line between the “bad” and “good” and that all ideas are useful in some way.

A third iteration is to have participants start with a stack of fresh cards and go for the wildest idea, pushing them to think outside of the box, no limitations – the crazier the better.

Once you get to the real ideation exercise, you can apply the ‘bad ideas’ approach again by getting out all of the obvious, already-stated ideas that everyone is already thinking about. We often put pressure on ourselves to come up with something new and inventive, but until we let go of what’s already there, there isn’t room to explore the not-so-obvious. To that end, encourage participants (or yourself!) to get those ideas out, even if you know they aren’t the greatest. Don’t wait until the perfect one hits, just write them all down and you’ll certainly get closer to the next big thing a bit sooner.

ideaton-sketching

During an ideation session with ACSM, we asked the group to give us their best ‘bad ideas’ on how to improve communication with their members. One suggestion, shown here, was to use a  telephone tree to release all news and information amazing!

Creating a Toolkit for Collaboration

Collaboration is on the rise in workplaces as businesses recognize it as one of the key components for increasing innovation and improving employee experience. Over the last few years, we’ve upped our collaboration game at SmallBox, in part, by listing it as one of our core values, and then bringing intention toward how we approach our work.

What once was a black box of strategy or design for a major project has now become a collaborative process between us and our clients. We bring our expertise in research, strategy and problem solving, clients bring expertise in their organization. Together, we go further than we could have separately.

To support a collaborative, human-centered process, we rely on a collection of methods – exercises and activities that allow us to diverge and converge around challenges and ideas. These methods help us collaborate in a variety of ways, from wireframing in a group, to researching and gathering organizational values, to understanding tone of voice, and beyond!

We create and test new methods (usually on ourselves first) on the regular, either by building on the ideas of others (such as those from resources like Universal Methods of Design and 101 Design Methods) or starting from scratch to craft something custom.

Experience mapping with a side of play. Game on.

A photo posted by SmallBox (@smallbox) on


As we’ve continued to build out our methods (we’ve got more than 50 at the moment!), we’ve corralled them into a repository that we like to call the SmallBox Collaborative Toolkit of Awesome™ (okay, okay, I just added the ‘of Awesome’ part). This repository helps us accomplish a few things: we can share methods with other teammates who may not be familiar, and we can easily keep track of all the methods that we have used and have at our disposal, and we can easily share them with our clients, should they want to lead the activity themselves in the future.

We’ve written the methods in our toolkit in a way that provides step-by-step directions, important considerations, challenges that might come up, and how to document any activity or outcomes for meaningful use. Here’s an example of a method, the 20-Second Test, from the Toolkit of Awesome:

›› Download a PDF of this bad boy here

Why bother with learning or designing new collaborative methods? It doesn’t make sense to simply throw people together into a room and have them figure things out as they go. We’ve all been in free-form brainstorm sessions where nothing really moves forward, or the same old ideas pop up. Using existing techniques, or creating your own, helps people know how to contribute. Bringing people together to solve with a shared framework sets us up to design the best possible outcomes.

Getting Moody

Sometimes it’s tough to know where to begin when designing a website. When given the chance to create something completely new (or ‘refresh’ the look and feel of a site), it can seem like a daunting task. The opportunities are endless—from sorting through Pantone swatches in search of the perfect shade of red to sifting through hundreds of typefaces in pursuit of the most appropriate lowercase letter ‘g’. There’s so much potential in a blank Photoshop file. It’s exciting and overwhelming at the time.

This creative predicament doesn’t just apply to websites; it may apply to brands, print materials, wedding planning, parties, and even remodeling bathrooms. With so many choices, where does one begin?

Two words, folks (or one word, depending on who you ask): mood boards.

What is a mood board?

Mood boards are used in a variety of disciplines to evoke the overall design direction and tone of a project. Mood boards aren’t actually ‘boards’ per se, but rather a compilation of the various elements that may contribute to a project. For example, a website mood board may include color swatches, typefaces, photographs, illustrations, icons, and patterns that will inspire a new site.

Mood boards are used to provide creative direction to a project—they’re broad on purpose. They serve as a palette for designers to pull, mix, and mold the pieces together as she begins to apply the element tones to the actual project.

Why should I use a mood board?

Mood boards are extremely useful as a team tool, allowing all members to contribute to the compilation and discuss its specific elements using a common language. For example, when brainstorming photography for a new site, one person’s definition of ‘clean’ might be vastly different from another person’s definition of ‘clean’. Discussions around the tone of specific elements in a mood board help designers determine what exactly is most appropriate for a project.

Exploring mood boards as a team also creates a safe space to explore. Ultimately, there are no surprises. Rather, all participants get to have a part in shaping the visual direction of a project. Everyone is invested.

How do I create a mood board?

Mood boarding comes in many formats. To begin any mood boarding exercise, however, it is important to consider the words and questions involved in articulating the tone of the new project. What values do we want to exhibit? How do we want people to feel when they see this work? How do we move them?

After some discussion and reflection, it is important to then collect as many elements as possible that are thought to evoke the desired tone. Diverge before converging. Explore a variety of compilations before deciding on one direction. Once this direction is found, it is then important to document it clearly.

Analog documentation may involve the collection of specific elements torn from magazines pages and other print pieces. Elements such as photographs and typefaces may be placed alongside color swatches and textures and tacked on an actual board. Digital mood boards may be a curation of images found across the web and placed within a flat, printed document.

Once things are documented and approved, it’s time to move into design!

To sum things up, mood boards are a wonderful tool for providing the creative direction of a project by compiling the specific elements that make up its palette. And furthermore, mood boards come in many formats—from collages, to gridded .PSD files, to Pinterest boards.

Yes, that’s right: Pinterest boards.

What have your experiences been with mood boarding? Have you done it before without even realizing (say, when pinning ideas on your bathroom remodel)?